# Create a Quiz
{% hint style="success" %}
You need to edit the **Quiz** . First, go to **WordPress Dashboard** → **Elementor** → **Settings** → **General** → **Post Types**, select all post types, and click **Save Changes**.
{% endhint %}
**Step 1: Navigate to the Quiz Section**
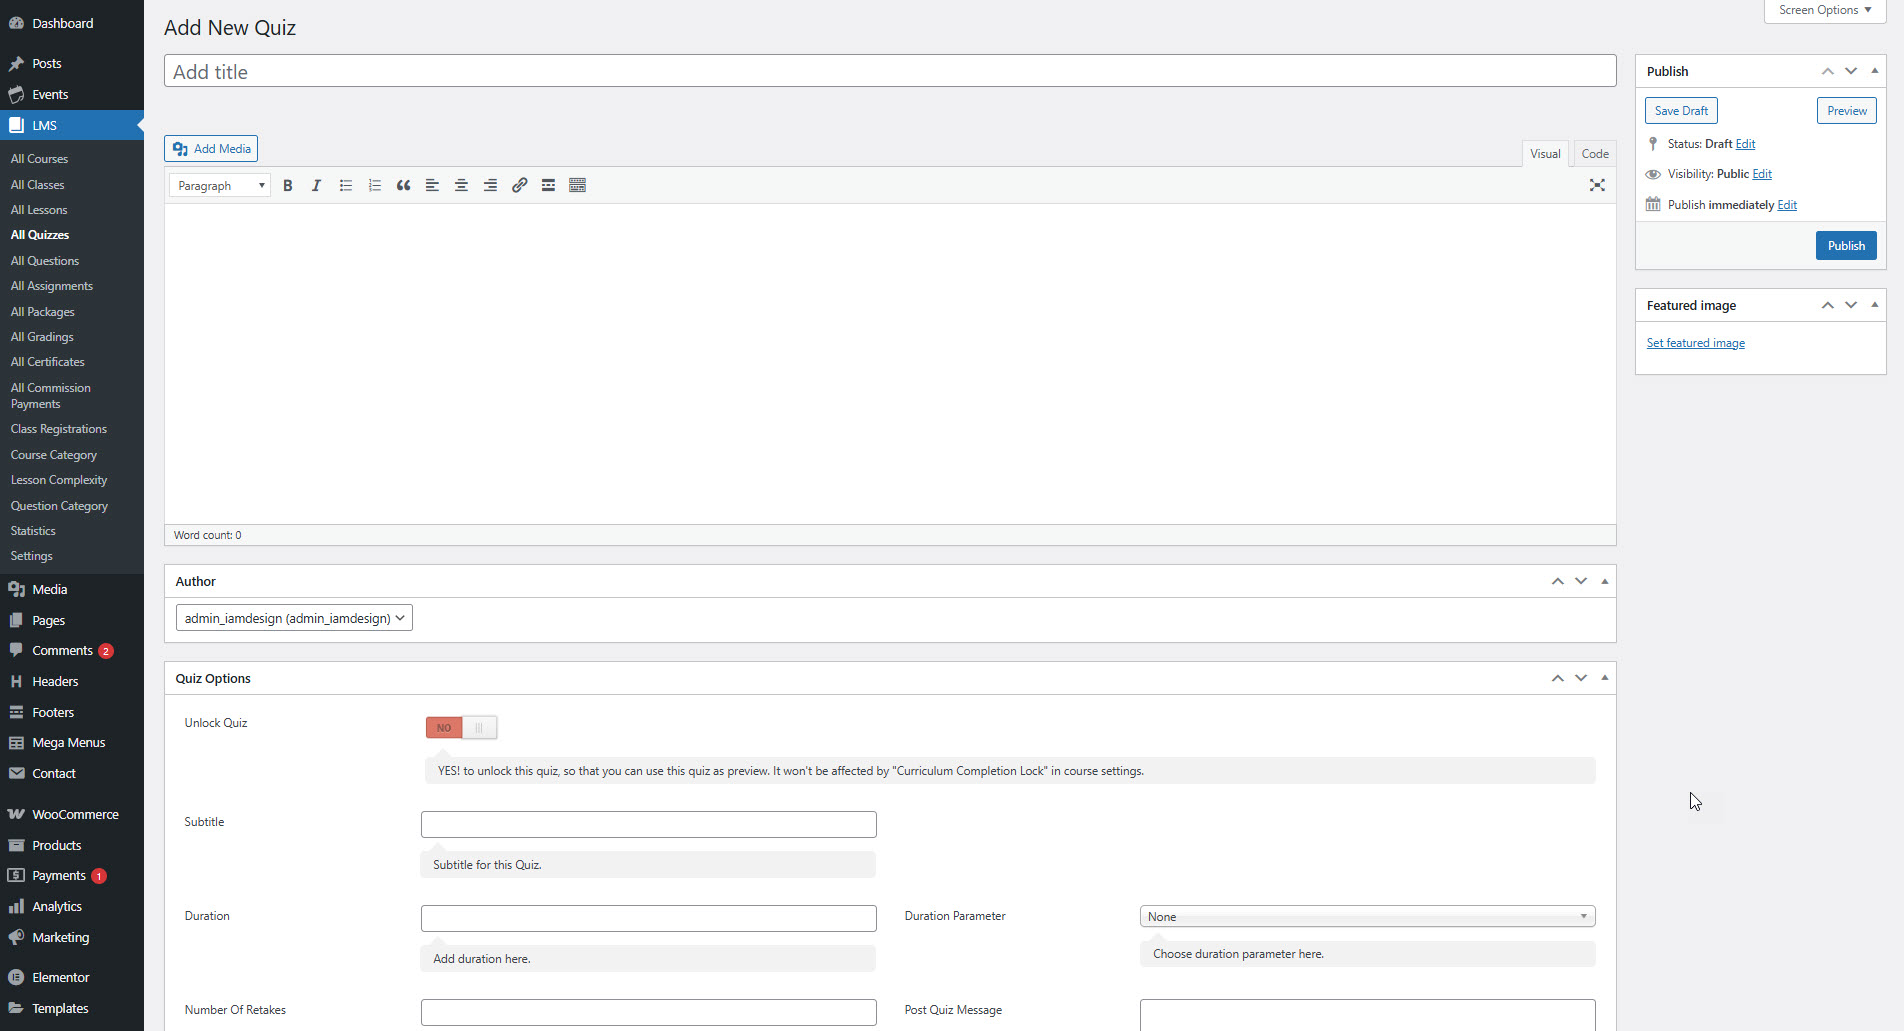
* In your WordPress dashboard, go to **LMS > Quizzes > Add New**.
***
**Step 2: Add Quiz Title & Content**
* Enter your **Quiz Title**.
* Optionally, you can add a description or instructions in the content editor.
***
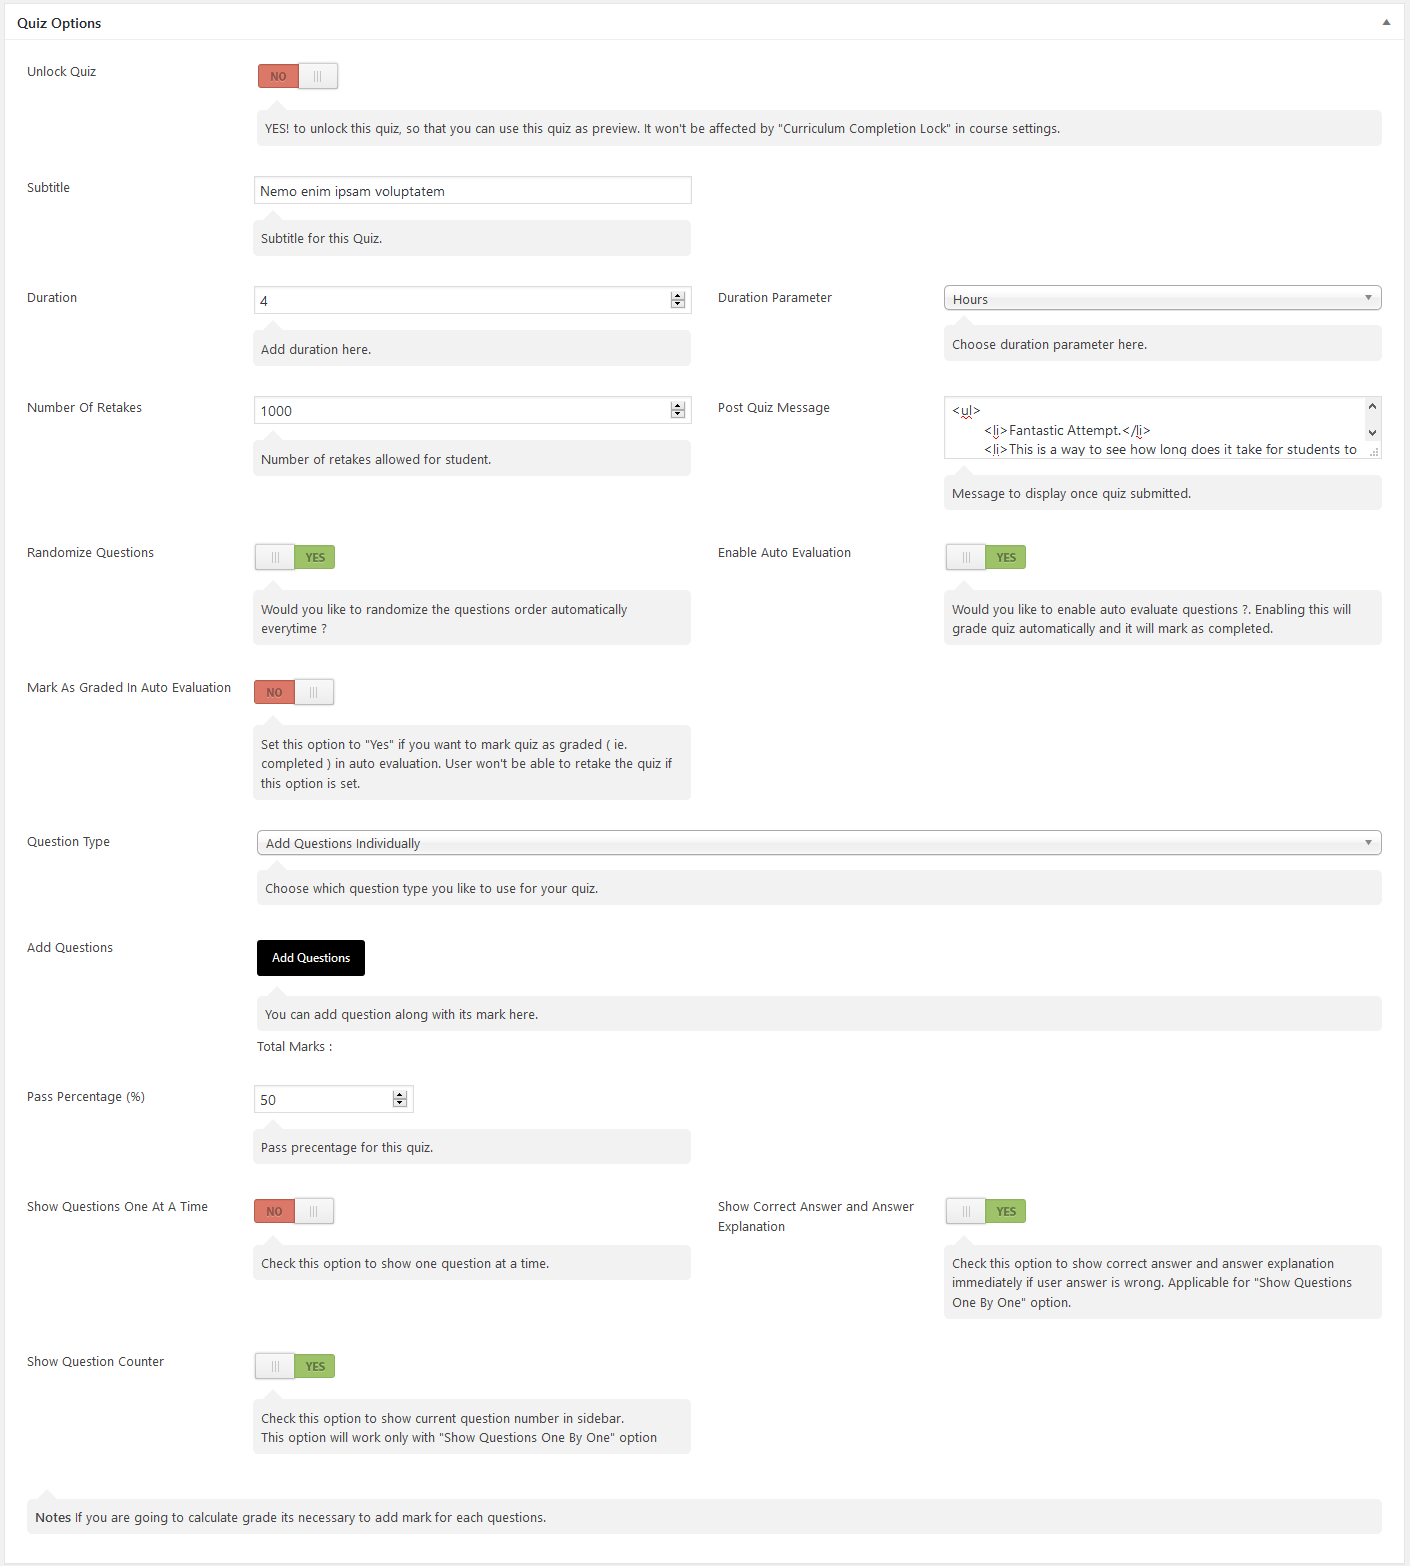
**Step 3: Configure Quiz Options**
**Unlock Quiz**
* Set to **YES** to allow this quiz as a public preview.
* Useful for free trials or previews (ignores curriculum lock).
**Subtitle**
* Add a subtitle for the quiz, shown under the quiz title in the popup.
**Duration & Duration Parameter**
* Set how long students have to complete the quiz (e.g., 10).
* Choose duration unit: **Seconds, Minutes, or Hours**.
**Number of Retakes**
* Enter how many times students can retake the quiz.
**Post Quiz Message**
* Add a message shown to users after submitting the quiz.
* You can use basic HTML (like `
`, `
`, etc.).
**Randomize Questions**
* Set to **YES** to shuffle question order each time quiz is loaded.
**Enable Auto Evaluation**
* Enables automatic grading after submission (for objective questions).
**Mark as Graded in Auto Evaluation**
* If enabled, once the quiz is auto-evaluated, it's marked as fully graded.
* Students won't be able to retake the quiz after it's graded.
***
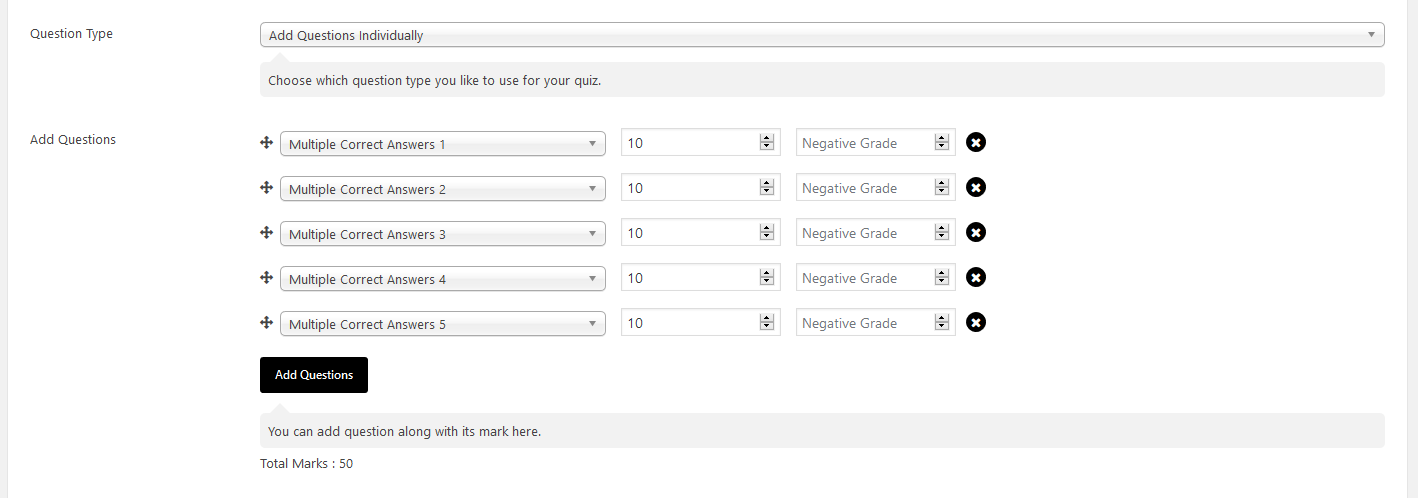
**Step 4: Add Questions**
**Add Questions Individually**
* Click “Add Questions.”
* Select from existing questions.
* Enter **Marks** and **Negative Grade** (enter as positive value).
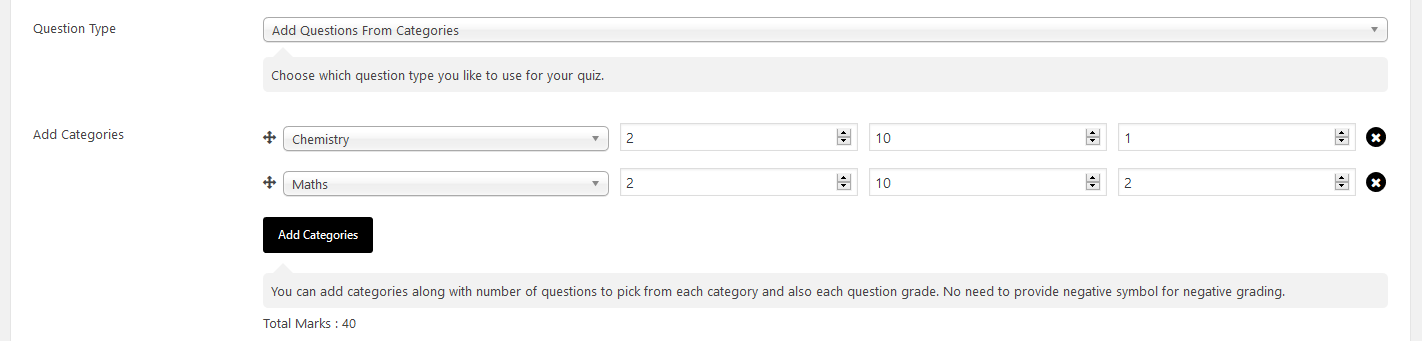
**Add Questions from Categories**
* Choose a **Question Category** (must be created beforehand).
* Set number of questions, marks per question, and negative marks.
* System will pull random questions from that category.
***
**Step 5: Additional Quiz Settings**
**Pass Percentage (%)**
* Define what % is needed to pass (e.g., 80%).
**Show Questions One at a Time**
* If enabled, each question appears one by one.
* Otherwise, all questions show on one page.
**Show Correct Answer and Explanation**
* Shows correct answer and explanation instantly if answer is wrong.
* Only works when "One at a Time" is enabled.
**Show Question Counter**
* Displays a question number counter in the quiz sidebar (with one-by-one mode only).
***
**Step 6: Publish Your Quiz**
* Click **Publish** to make your quiz live.
***
**Step 7: Attach Quiz to a Course or Lesson**
* Go to **LMS > Courses** or **LMS > Lessons**, edit your item.
* In the **Curriculum** section, click **Add Quiz** and select your quiz.